An MTA Train Arrival Sign for the house
Introduction
For quite some time my friend Gent and I have wanted to have our own MTA train arrival indicators in our respective apartments. Not only does it look awesome but it serves a great purpose.
By seeing in how many minutes the train will arrive we can make faster decisions about how much time we have to leave the house, or when would be optimal. Instead of needing to remeber to check our phones each time/.
We originally wanted to make it 2 years ago, but ended up getting busy with building ThreatRecord Intellgience.
Pre-Build Prep
Last weekend Gent called me and said he wanted to get the project done. During that on call we decided to plan and find all the parts. While the RGB Panels are expensive on Amazon, they are cheap on Alibaba, but take longer to arrive.
So to start off we grabbed them from Mr.Bezos. I agreed to give him my Raspberry Pi4 for the project and we got to work writing all the code.
API Work
The NYC MTA used to require for you to have an API key to access the resources, but now its open to everyone.
The stanard that they use is GTFS (General Transit Feed Specification), which was created by the great people at Google. It supports trip updates, service alerts, as well as vehicle positions.
Soon enough we had the API working for our own stations.
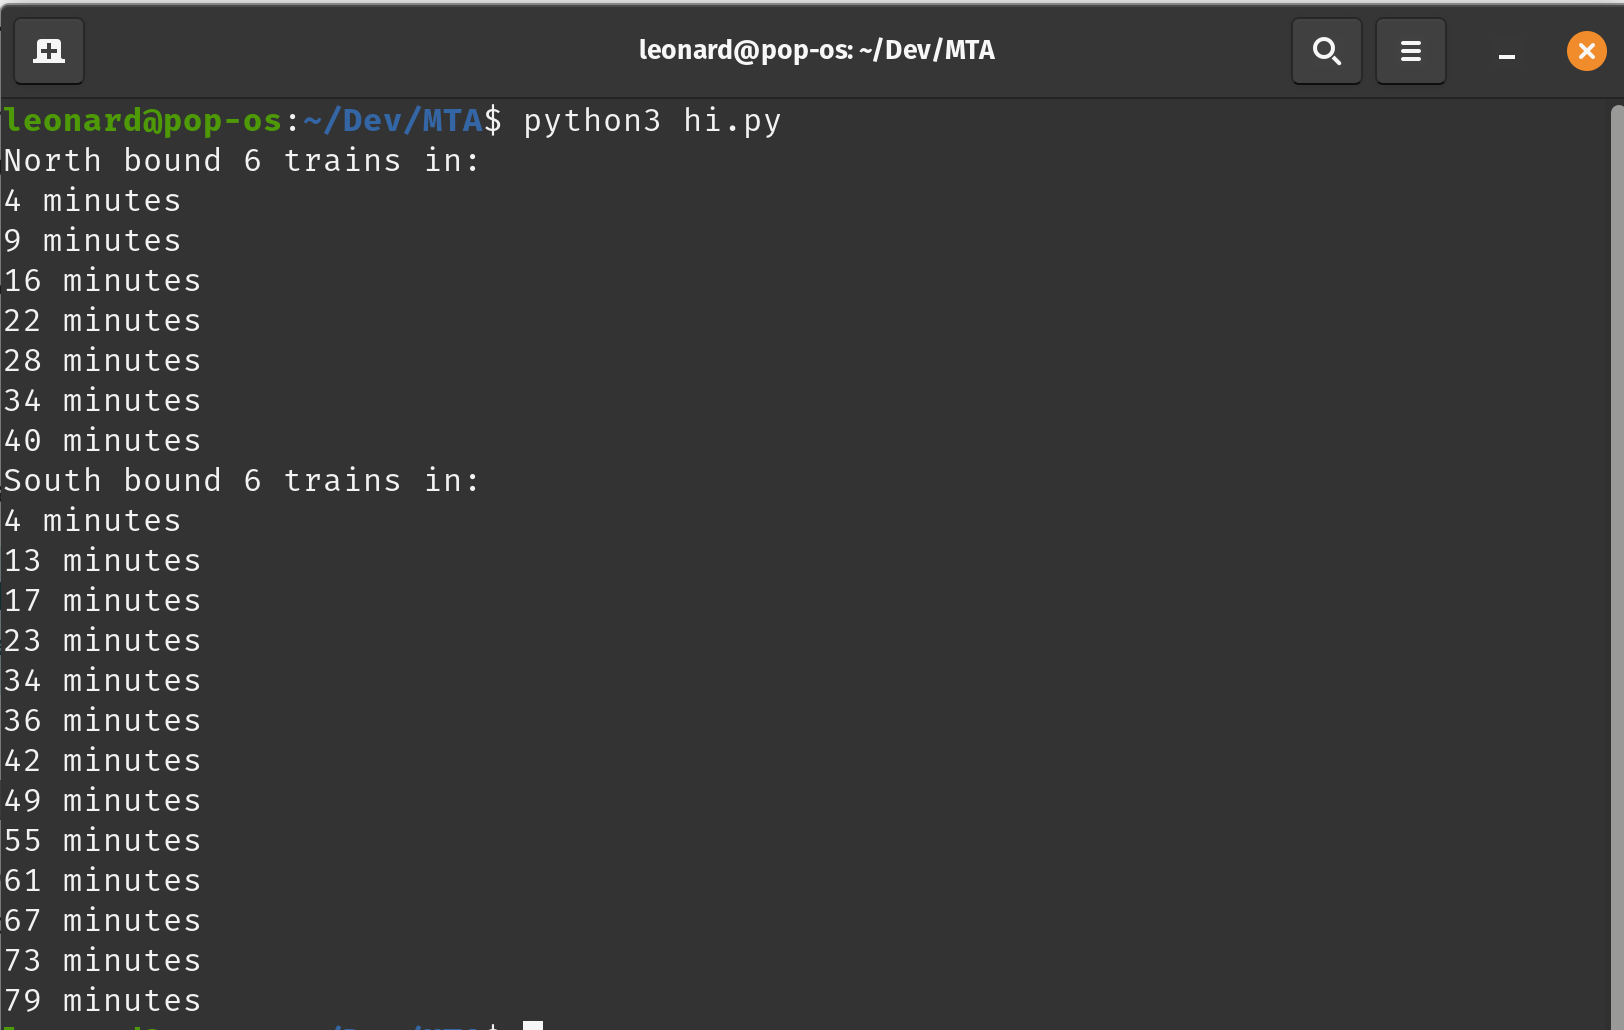
Now we just need to wait for the parts to arrive.
Building the thing
Building it was fairly simple, we just needed to plug a few cables in.
- Plug the HAT in to the Pi
- Attach power cables from the HAT to 2 32x64 RGB Panels
- Daisy chain a data cable Pi HAT -> Panel 1 -> Panel 2
Really easy stuff. However we do plan on creating a nice enclosure so that will be more work down the road.
Displaying to the screen
The library we used was rpi-rgb-led-matrix by hzeller. Which let us put a cool demo of spinning cubes.
Showing our own data
At first we didn’t want to reinvent the wheel and looked for other MTA Display Sign librarys of which there are plenty.
However all of them were fairly not cusomizable and were lacking some features we wanted. So we took to better understanding the rpi-rgb-led-matrix library and began slowly planning out what we wanted. A letter here, circle here, etc.
Our first version was pretty basic, but worked nontheless
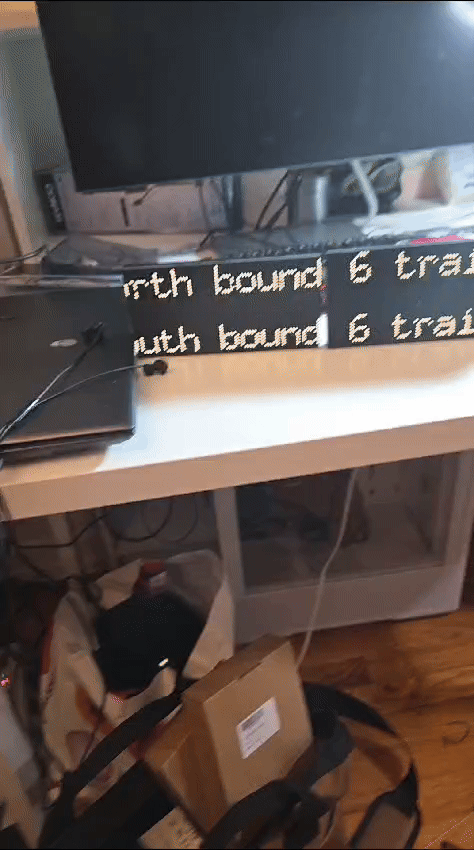
The font was basic, and we didnt really have the nice train icons. But we were displaying!!
Next we made the text not move, and added in the icons to the left.
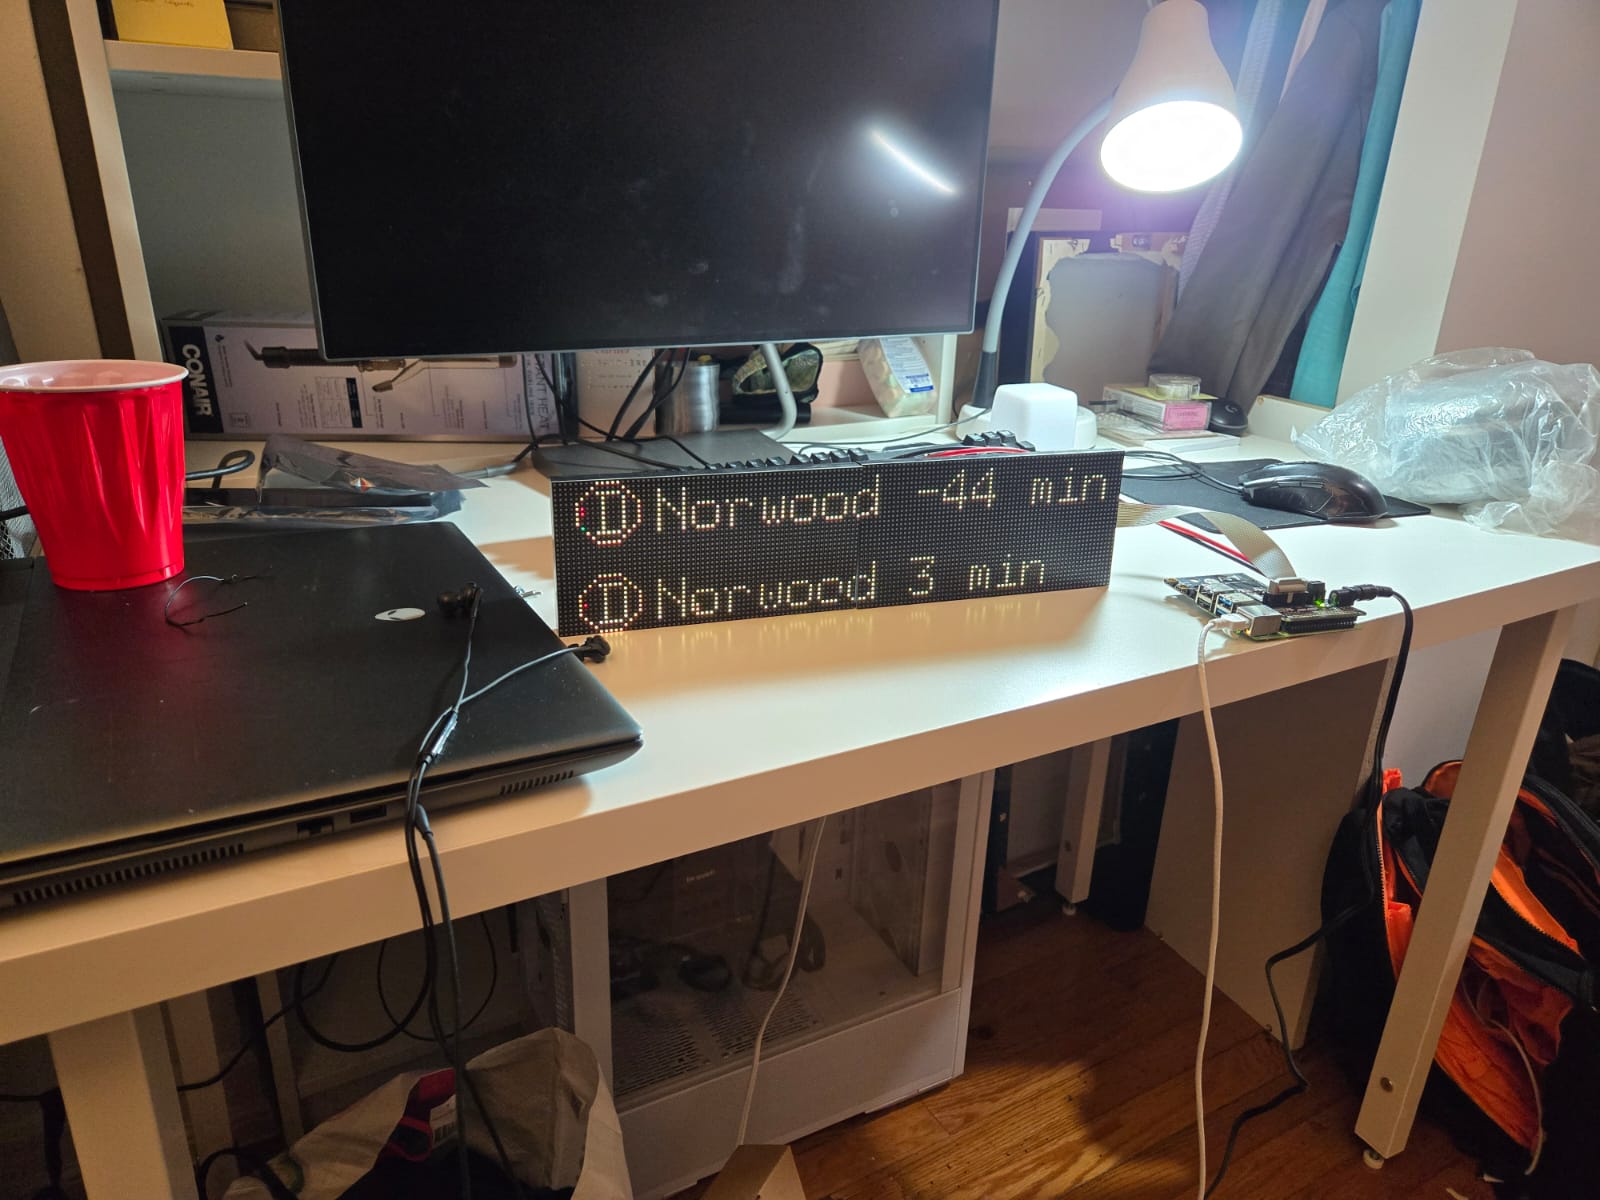
We are getting closer! However we want to give it more of a pizzaz, so we try to fill in the circle with the right color.
The library that we are using has a method to create circles, but not to fill it in. Our first attempt was to draw a bunch of circles in deciding order of radius, but that performed poorly and also had some pixels missing.
The easy solution was to just use the method to draw pixels. (We also played around with the fonts for the third versions)
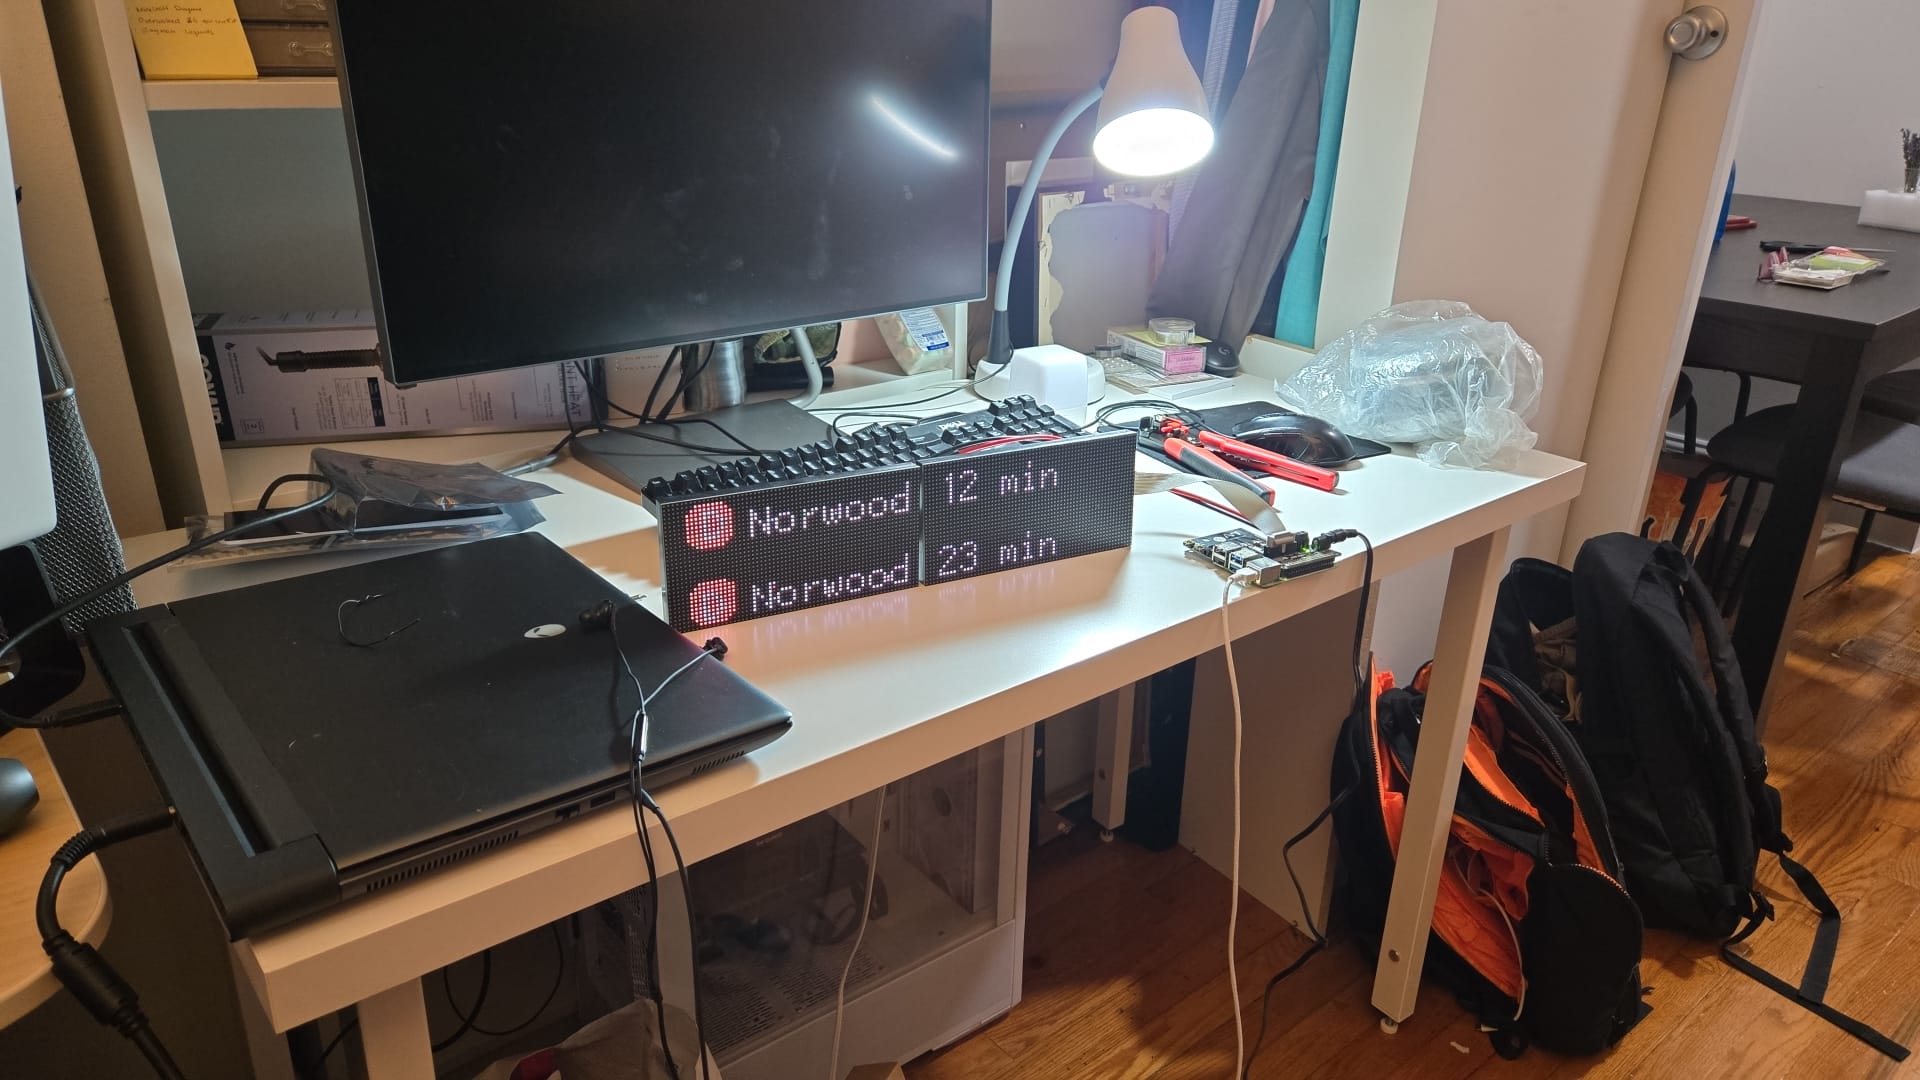
But the sizing was not quite there
q
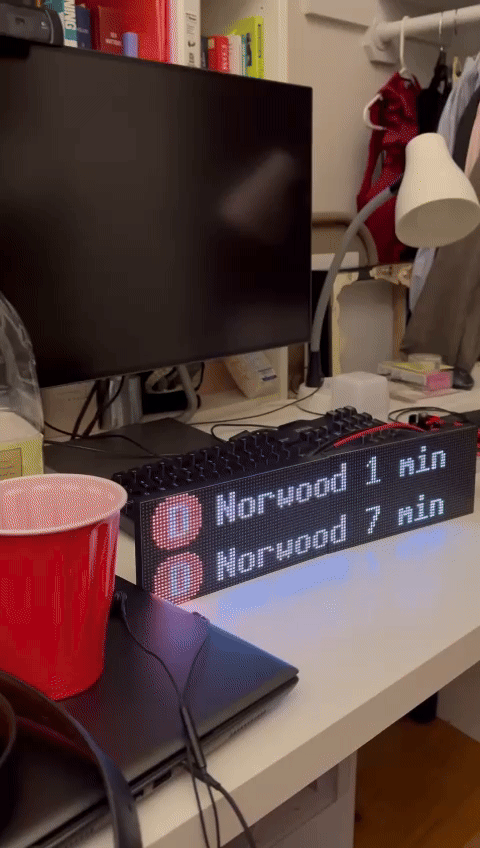
Honestly at this point we had gotten what we wanted.